


The Art of Finance’s Holly Johnson offers some simple but effective ways to speed up suitability report writing.

If you type in google ‘Paraplanner jobs near me’ we can bet that the results are going to be pretty high. If you have any reference to being a Paraplanner on your LinkedIn profile then you’re probably aware of the never-ending messages from recruiters on a daily basis, too.
If we take a look at some of the paraplanning job adverts and after spending a good time scrolling down the long requirements, you’ll see that paraplanners are pretty much a core function within financial planning.
We find that financial advisers are looking for a reliable person to bounce ideas off, make sure that their file is compliant, and point out any potential gaps. At The Art of Finance, we provide our paraplanning students with the resources to understand and embed the advice process and the technical complex tax calculations that the advisers are looking for… not just getting people through their exams and admitting defeat that yes, the CII still love asking about endowments!
One thing we have noticed, however, is that some firms overlook the basics. Employers will put paraplanners through training courses, listen to complex Inheritance Tax and investment bond webinars, and exam training. But what about actually using Microsoft Word properly?
It sounds silly, but many paraplanners will spend a good chunk of their day report writing and yet have no idea how to format a document properly. Their reports will still look great, but it was probably after a lot of tutting, getting annoyed, and swearing when images appear in random places of the document. We are lucky to work in an industry where there has been, and still is a lot of demand. However, with that comes a very tight calendar and working long hours.
We thought we’d go back to the basics and point out some of the very overlooked aspects of Microsoft Word which may improve the efficiency of report writing.
Tip number 1.
Make sure that your templates are formatted. We don’t mean just pressing Ctrl + A and changing the font. By clicking home, you can format the body of the text, sub headings and headings and so on.
Set up your templates in this formatting and if you do copy and paste something and Word decides to go a bit rogue… it’s a much easier fix!
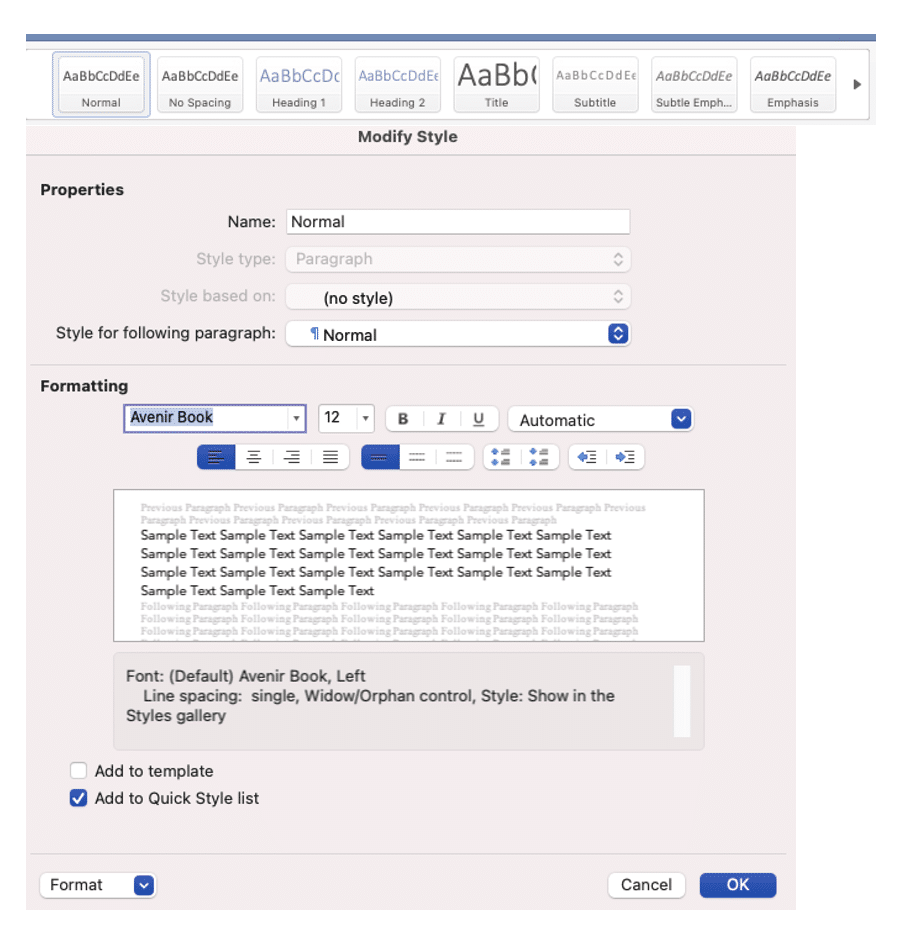
You can change everything from the colour, the font and the spacing. Modify these styles and apply them through your template.
Tip number 2.
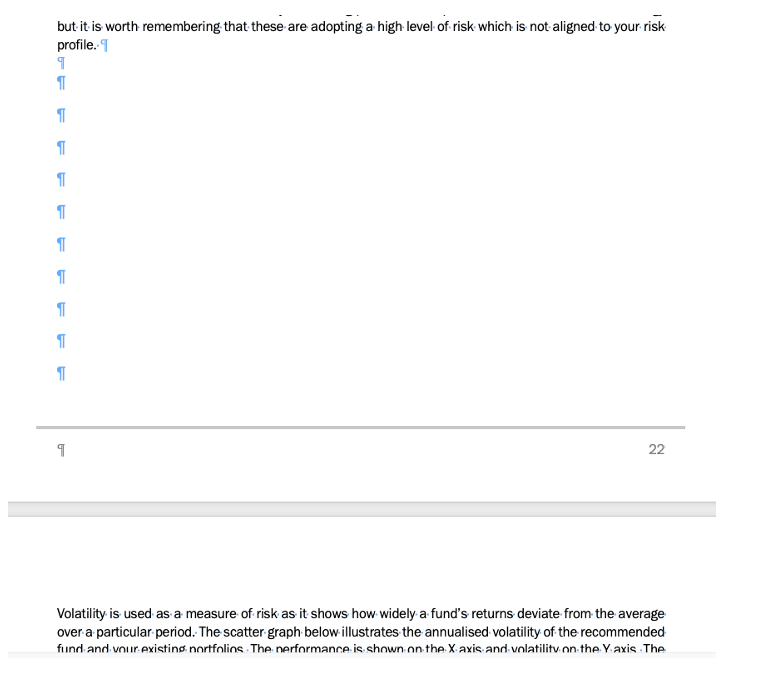
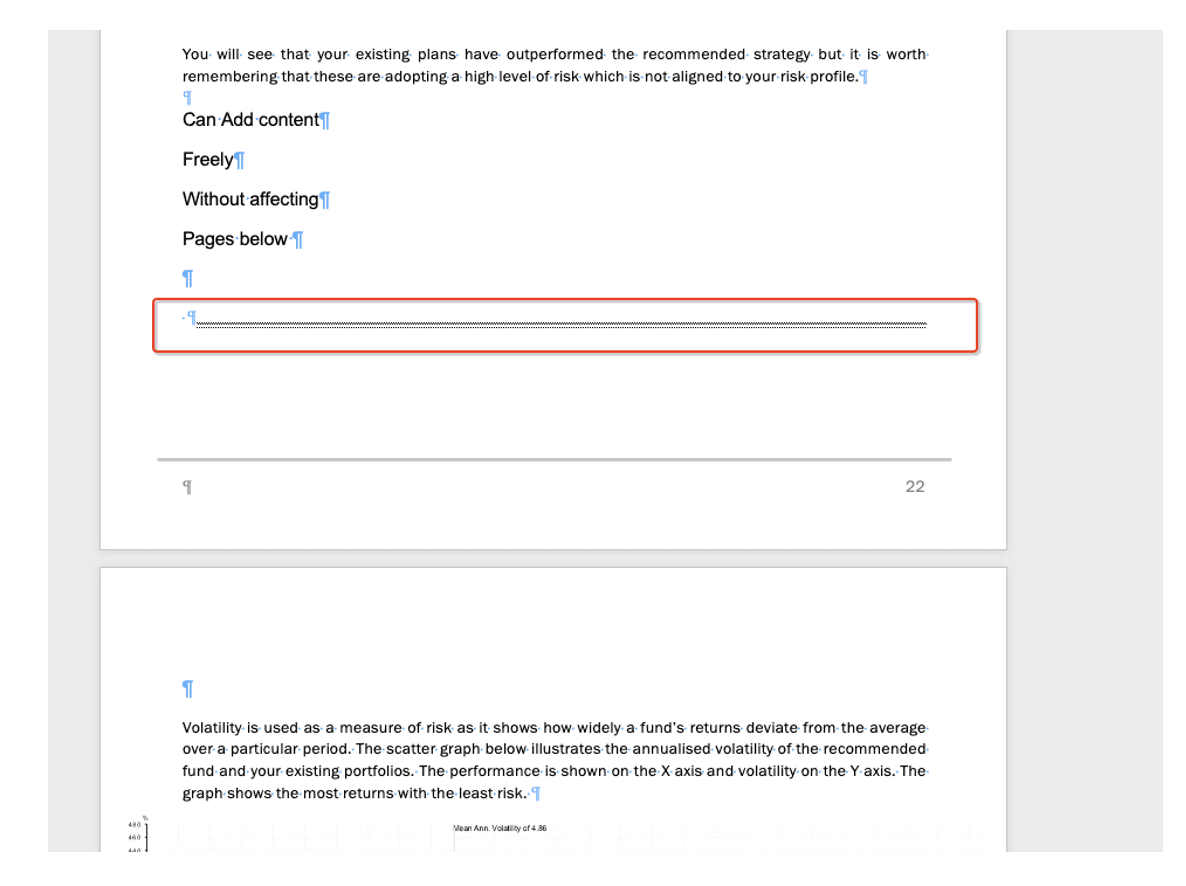
In word, there is a button which you can press which shows all the formatting on the page.


This means you’ll see a little dot between words showing spaces created through pressing the spacebar.
This symbol will show when a new paragraph starts which has been created by pressing return. It’s good to show the formatting now and again as it can show any mistakes and help you resolve any formatting issues.
Tip number 3.
If you’re wanting to create space and separate sections in a word document, spamming return / enter isn’t the best way to achieve this.
When reviewing the report, you may be thinking that it could do with some clarification there and you’ll add an extra explanation. However, if you’ve used return to format the whole document, then it’ll mess up the next page, and the next page… you get the drift.
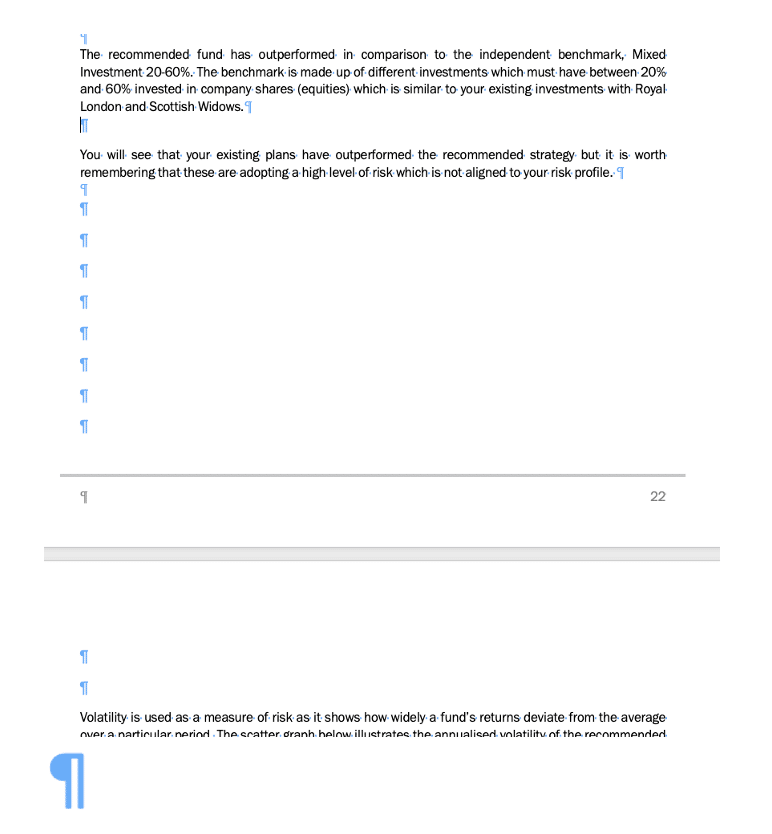
You’ll see that each symbol represents a new paragraph and when you start inserting your content, it’ll then drag the content down in the next page. This means you’ll need to go back and delete space. Easily done but it isn’t the most efficient way.
- Instead of spamming return/enter to create space, go to where you want to create space.
- Click on Layout at the top.
- Page Break.
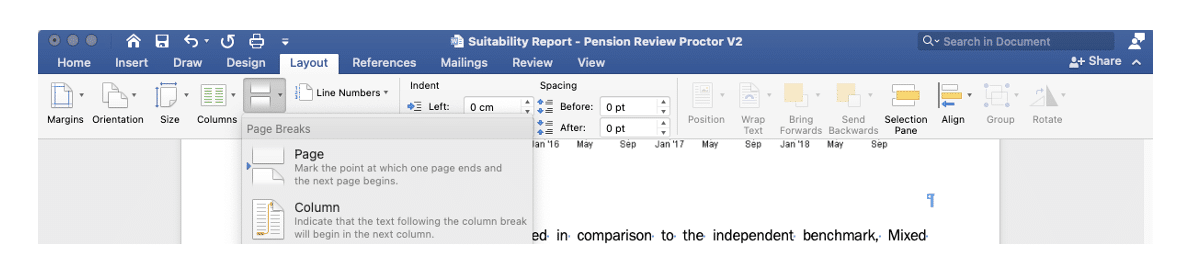
Now you can easily add content without it affecting the formatting below.
If you turn the formatting symbol on, you’ll be able to see where the page break is.
You can also add a ‘Section Break’, This means the section of the document you’re creating will be treated completely differently from the rest of the word document. This is useful if you’re wanting to change the margins, landscape or anything really!
Tip number 4.
In a suitability report, one of your goals is to present the information nice and clearly so it helps the client take it all in. One way to achieve this is to put information in a table. However, inserting tables may be the bane of your life, especially if you’re manually faffing with them.
Once you’ve created or clicked in a table, two new tabs should have appeared, Table Design and Layout.

In Table Design, you can modify and create a style such as changing the width and colour of the borders, the heading and so on. Having a saved, modified table design will save you time in the long run. Just like creating and modifying styles for the main body of the report and headings.

Once you’ve created a table and input the information, you’ll want to tidy it up.
It’s unlikely that everything is going to fit nice and neatly. The easiest way to do this is under the Layout option which appears when you’re working in the table.
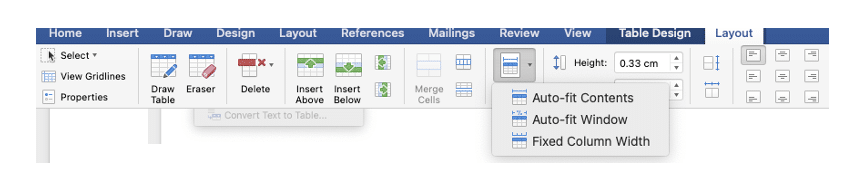
You can make the content fit automatically and increase the size of the table so it runs across the whole page.

You can also change the height, width and alignment of text.

This can save A LOT of time! You will also see that you can easily insert rows and columns.
Tip number 5.
You can change the orientation of your document from portrait to landscape. Go on layout and then select orientation. Landscape may be a good shout if you’re copying a lot of images into the document.
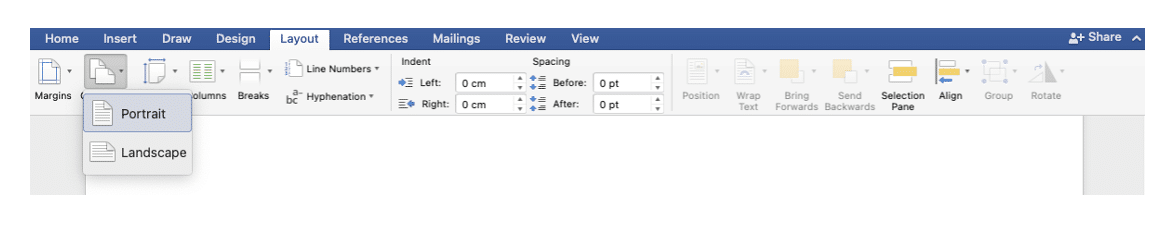
Remember to include a section break! That way you can have one page landscape and it won’t mess up the rest of your document.
As a paraplanner’s role is becoming more and more intrinsic within the financial services, it’s easy to forget about the basics which can hugely benefit your time. Enrolling yourself on a Microsoft Word course or watching YouTube tutorials may not sound like the most exciting thing in the world… but they’ll be some tips and tricks in there that may benefit you in the long run.
If you want to hear more about the paraplanner role, with other practical tips from experienced paraplanners, check out The Art of Finance’s free webinar: Paraplanning 101 with Para-Sols on Oct 28th.
[Main image: christin-hume-unsplash]